Internal leak detection
Pipeline leak detection includes hydrostatic test after pipeline erection and leak detection during service. This article mainly refers to in-service leak detection.
Pipeline networks are the most economic and safest mode of transportation for oil, gases and other fluid products. As a means of long-distance transport, pipelines have to fulfill high demands of safety, reliability and efficiency. If properly maintained, pipelines can last indefinitely without leaks. Most significant leaks that do occur are caused by damage from nearby excavation equipment, therefore it is critical to call authorities prior to excavation to assure that there are no buried pipelines in the vicinity. If a pipeline is not properly maintained, it can begin to corrode slowly, particularly at construction joints, low points where moisture collects, or locations with imperfections in the pipe. However, these defects can be identified by inspection tools and corrected before they progress to a leak. Other reasons for leaks include accidents, terrorism, earth movement, or sabotage

The primary purpose of leak detection systems (LDS) is to assist pipeline controllers in detecting and localizing leaks. LDS provide an alarm and display other related data to the pipeline controllers in order to aid in decision-making. Pipeline leak detection systems are also beneficial because they can enhance productivity and system reliability thanks to reduced downtime and reduced inspection time. LDS are therefore an important aspect of pipeline technology.
According to the API document “RP 1130”, LDS are divided into internally based LDS and externally based LDS. Internally based systems utilize field instrumentation (for example flow, pressure or fluid temperature sensors) to monitor internal pipeline parameters. Externally based systems also utilize field instrumentation (for example infrared radiometers or thermal cameras, vapor sensors, acoustic microphones or fiber-optic cables) to monitor external pipeline parameters
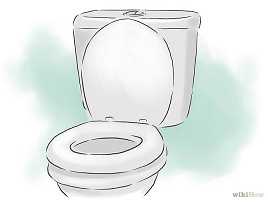
How to Detect Toilet Leaks
Toilet leaks may be easy to repair, but detecting them is a great challenge, especially when they are completely silent. It's nerve racking to view a water bill and see the amount double or triple what you normally pay for. Here is a very quick and easy method to detect a toilet leak.

Leak Control in Bathroom
To detect water leakage in the bathroom should be checked the following:
- No dripping water from the shoulder
- No dripping water from the bathroom faucet
- Bathroom floor dry without the input of sewage on the floor
- If there is a leak in the bathroom, take the following steps
- Replace faulty gaskets
- Replacement shoulder
Control valves leak in the building
- Pysvary valve wall washing machines
- Wall Pysvary milk Dishwasher
- Tap yard
- Tap Parking
- Tap the roof
- Tap water garden
- Tap for refrigerator
leak Control in the building installations
At this stage, all facilities and connections to the following should be checked and controlled. Building installations in large buildings and residential complexes are usually smaller room in the building, there is usually a package of heating systems.
- The output water pumps
- The suction pipe water pumps
- Boiler fittings
- Fitting central heating and cooling plants
- Accessories high pressure valves
- Equipment for watering green spaces and gardens
- All toilets and bathrooms in the building installations
- Hot and cold water inlet and outlet connections all of its packages
- Spill control building radiators
- Control the leakage of the cooler and connections
Leak control in pool
It's natural for your pool to lose some water to evaporation, some to splash out, and some to backwashing your filter. But if you routinely need to add more than two inches of water to your pool per week, you may have a leak. Uh oh, right? Not so fast. Before you call the local pool tech, give your pool a once-over and determine whether you can't fixit yourself.
Check the obvious first
Here's a list of common problems that could indicate a leak, in no particular orde
- Are there any leaks at the equipment pad? Look closely at the filter, pump, heater and the pipe valves.
- Are there any wet areas around the pool? Check the ground for moisture. Walk around the pool, and by the pool and the equipment. Check for wet soil and sunken or eroding areas.
- Do you have a vinyl liner pool? Look for tears or separations around all the fittings, skimmers, returns, cleaner
- line, lights, steps and the corners.
If you want to confirm a leak, try one of these techniques to double-check.
If you suspect your pool is leaking, there are several ways to check.
- Mark the water level of the pool at the skimmer. Use a piece of tape or grease pencil to mark the water level. Check the mark 24 hours later. Your pool should lose no more than 1⁄4 inch (0.6 cm) per day. Otherwise, a leak is indicated.
- Place a bucket filled with pool water on a pool step (weight it with a rock or brick). Mark the water level on both the inside and the outside of the bucket. Make sure the water levels are the same inside the bucket as the pool water level outside the bucket. Check the mark 24 hours later. If there's a greater drop in the line on the outside of the bucket, a leak in the pool is indicated. This test needs to be conducted with the pump on, then again with the pump off.
Determine the location of the leak.
If you determine that your pool is losing water, turn off the filtration system and note where the water stops dropping. Vinyl Liner pools need to have water in them at all times! Stop this test if you have a liner pool and the water level is dropping rapidly. Start adding water and call a pool professional.
- If the water stops at the bottom of skimmer opening, the leak is probably in the skimmer or filtration system (including the pipes). If you suspect you have a leak in the filtration system:
- Check, first, to see if you see air bubbles in the water in the return line when the pool's pump is running. If so, there is a leak in the suction side of the filtration system.
- Ensure the pump basket lid is on tight and that the lid o-ring is lubed and in good condition.
- If the water stops at the light, the leak is probably at the light housing.
- If the water drops below the light, then there may be a leak in the drain at the bottom the pool.
- If the pool is losing more water while the pump is running, the leak is on the return line side of the system. In this case, check the waste or backwash line for running water,
- If you suspect you have a leak in the skimmer, light, liner, look closely for something that looks like a crack, gap or tear.
Put a drop or two of dye test solution or some of your pH indicator test reagent near a suspected leak point.
Do this with the pump shut off and the water still. See if the dye is sucked into the crack, gap or tear.
Not all of the leaks outlined in this article can be located and if you're not used to plumbing positioning, you may miss something easily. All the same, if you try these steps, you should be able to find an approximate location and this is a most valuable exercise in itself because it will help the plumber (many plumbers do not like searching for a problem so anything you can do they will appreciate), making it time saving for the plumber and that translates into savings for you.
